Celeste is my little contribution to the Hugin project. About 2 days before the GSOC deadline I noticed that Hugin was on the project list. I looked at the list of project suggestions and noticed one titled ‘sky identification’. A bit of Googling around on subjects like ‘texture discrimination’ and ‘Gabor filtering‘ and I was ready to propose a solution.
The problem is this: photo stitching software relies on objects within different images remaining in the same place. Control points are then used to match corresponding positons in each photo. However, panoramas are often captured over a number of minutes. During this time frame, non-static features such as clouds, water, and other objects (usually influenced by wind) may move significantly thus creating problems for automatic alignment tools. Should a control point be added to a cloud in photo A, the same cloud may have moved by the time photo B is taken, so the corresponding control point on the same cloud in photo B will actually be in the wrong position.
To implement a solution to this problem, I used a classification algorithm called a Support Vector Machine. SVMs are binary classifiers, so the objective is to use one to make a simple call: is this control point on a cloud, or not. The SVM uses textural and colour information around the control point to make this judgement, based on what it has been trained to recognise. The training process involves providing labeled example of each category (cloud/non-cloud) so the SVM can learn to discrminate between them. Simple eh?
Ok enough theory, here it is in action. You’ll need a recent version of Hugin (I’m using SVN version 3545 on Ubuntu here) and you can download the examples from here. Load some images and generate control points. There are a few ways of running Celeste; I’ll show you how to do so via the control point editor panel first.
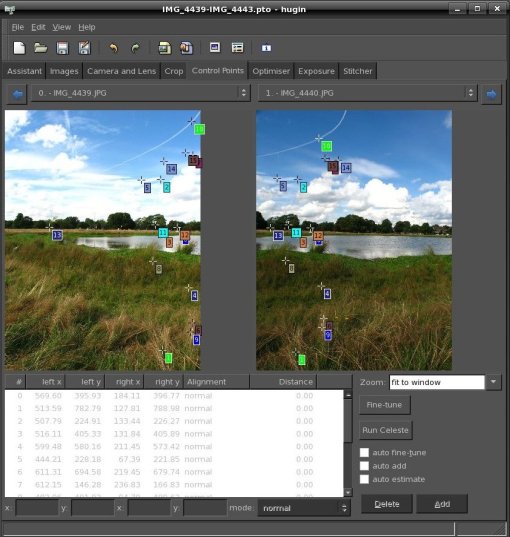
Select a pair of images. For these two in the example, there are 15 control points connecting the two images, 6 of which are on clouds – we want to get rid of these. Hit the ‘Run Celeste’ button and wait a few seconds. A message box should pop up saying how many control points have been removed:
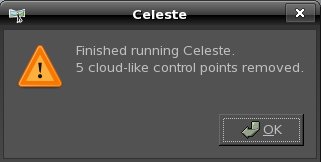
Click OK then have another look at the control points. Of the 6 on clouds, 5 have been removed. In this example none of the non-cloud control points have been removed:
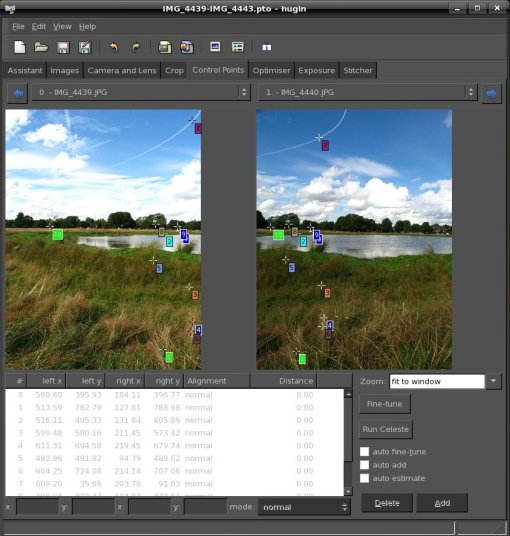
The only cloud control point remaining is actually on an airline exhaust trail (which, being a fairly straight line, is not very cloud-like). So we do pretty well here – 15/16 control points correctly classified is about 93% accuracy. This is a good example; under stringent 10-fold cross validation, Celeste was 82% accurate.
You can also run Celeste from the images panel. Simply select the images that you want to run Celeste on (or select all of them) and hit the ‘Run Celeste’ button again. Exactly the same thing should happen – a message will pop up saying how many control points have been removed:
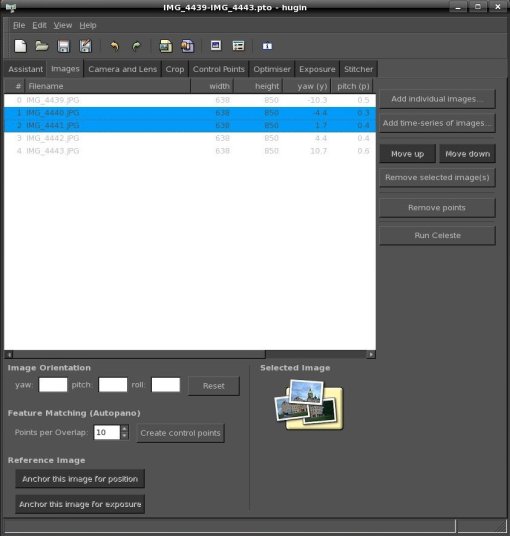
There’s one more way of running it – right at the start on the assistant panel. After control points have been generated, Celeste will scan all the images and remove cloud-like control points from the whole set. To run Celeste this way open up the preferences panel and activate the ‘Automatically run Celeste..’ option. Then hit ‘Align’ on the assistant panel, and Celeste will run after control point generation:
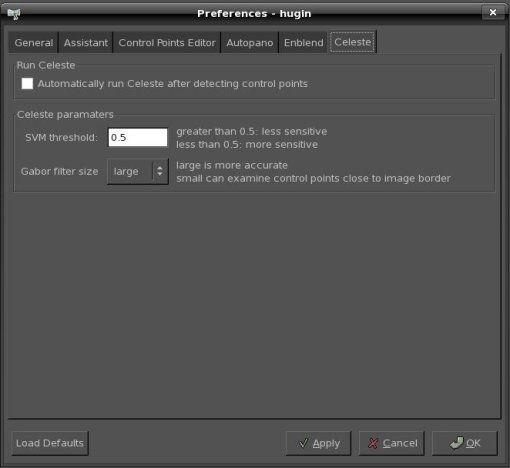
And that’s it! There are a few other options on the preferences tab; to alter the sensitivity you can adjust the threshold value. The SVM will generate a score for each control point, where greater than 0.5 indicates a cloud. If you want to remove more control point reduce the threshold (try 0.4 to begin with), and raise it (e.g. 0.6) if you want to remove fewer. If there are lots of control points close to the image border, you may have more luck using the small filter size. In most cases you won’t need to adjust this though.
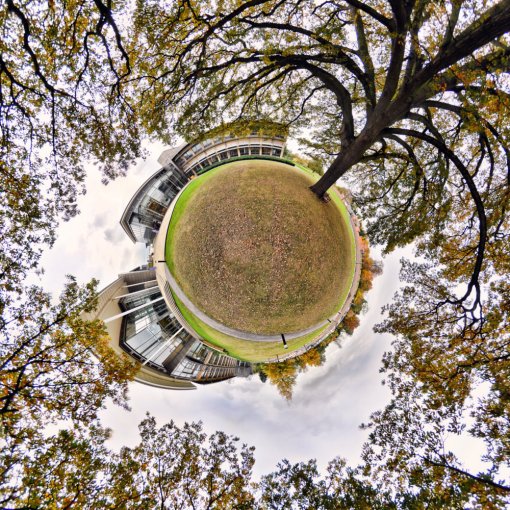
I found a great planetoid on Flickr – check this out. Fpsurgeon did a great job on it but I think he’ll have an easier time using Hugin/Celeste:
“The biggest pain in this shot was shooting the pano quickly enough that the clouds didn’t have the chance to drift much, since that makes stitching a pain, and I had to manually choose the control points since autopano-sift-c wanted to put them all over the clouds.”
Special thanks to Yuv Levy, Harry van der Wolf, Simon Prince and Google for making Celeste happen. Cheers 🙂
